Green Leaf Seamless Patterns Graphic: A Practical Guide to Using High-Quality Designs
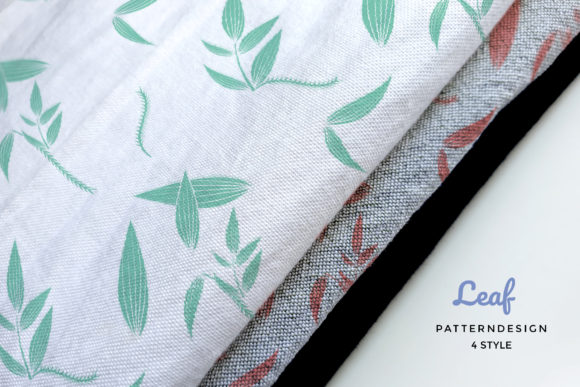
If you have been looking for versatile, ready-to-use patterns for your creative projects, the Green Leaf Seamless Patterns Graphic set offers four unique designs that blend natural leaf motifs with dreamy illustrations. Whether you are a seasoned scrapbooker, a small business owner designing packaging, or a blogger creating custom backgrounds, this collection promises flexibility and consistent quality. But like any design resource, getting the most out of it requires understanding a few key details. Many users rush in, grab the files, and then struggle with size, color shifts, or format mismatches. This article walks you through common pitfalls and shows you how to use these patterns efficiently, from digital projects to physical prints.
Understanding the Product: What Green Leaf Seamless Patterns Graphic Actually Includes
The set comes with a range of file formats: AI, EPS, SVG, PDF, plus JPEG and PNG at 300 dpi. The patterns are fully editable, meaning you can adjust colors, scale, or combine them with the matching clip art. Beginners sometimes overlook the editable vector files and default to the raster versions, which can limit flexibility. Knowing that the AI and EPS files allow infinite resizing without quality loss is a game-changer for professional use. The SVG format is particularly useful for cutting machines or web graphics. The PDF is great for quick printing. With four patterns and matching clip art, you have a mini toolkit rather than just a background.
Common Mistake #1: Choosing the Wrong File Format for Your Project
One of the most frequent oversights happens when a creator selects a file type that doesn’t match their workflow. For example, using a JPEG for a large-format banner can lead to pixelation, because JPEGs compress and lose detail. The PNG at 300 dpi is better for screen use with transparency, but it is still a raster image with fixed dimensions. For fabric printing or large signs, the vector formats (AI, EPS, SVG) are far superior. You can scale them up to billboard size without any blurriness. Another scenario: a scrapbooker wants to print small pattern tiles for a card. In that case, the JPEG or PNG at 300 dpi is perfectly fine and easier to handle. The mistake is not matching the format to the end use. Always check your output size and required resolution before picking a file.
Better approach: For any project where you need to resize the pattern significantly, open the AI or EPS file in Adobe Illustrator or a compatible free tool like Inkscape. For quick, single-use prints, use the high-res PNG with transparency. For cutting machines like Cricut or Silhouette, use the SVG. Keep the PDF as a reliable universal option for sharing with print shops.
Common Mistake #2: Ignoring the Seamless Nature and Repeating Tiles
A seamless pattern is designed to repeat perfectly without visible edges. Many users treat it as a single image and place it only once, missing the opportunity to create continuous backgrounds. This often happens when someone uses the pattern in a digital planner or blog background and leaves empty space around it. The real value of a seamless pattern is that you can tile it infinitely. If you use the pattern as a fill in software like Photoshop, Canva, or Illustrator, you can set it as a repeating pattern layer. For physical scrapbooking, you can print multiple copies and align them, but the easier method is to print a large page-sized tile from the vector file. A related mistake is not testing the repeat edges before final printing. Even though the design is seamless, a low-res JPEG might show seams if compressed. Stick to the high-res PNG or vector version for clean repeats.
Better approach: In your design software, create a new document the size of your project. Import the pattern file (preferably SVG or high-res PNG) and use the pattern fill or tile function. Preview the repeat at actual size to ensure no visible lines. For physical crafts, print a small test square first.
Overlooked Detail: Resolution and Print Size Expectations
The provided PNG and JPEG files are 300 dpi, which is standard for high-quality printing. However, 300 dpi only means a certain number of pixels per inch. If your pattern file is 3000 x 3000 pixels at 300 dpi, it will print at exactly 10 x 10 inches. Beginners sometimes assume 300 dpi automatically means it fits any paper size. If you try to stretch a small PNG to fit A3 or larger, the resolution drops and the pattern looks fuzzy. Check the pixel dimensions of the file and calculate the maximum print size. For larger projects, switch to the vector files. Another overlooked detail: the colors in the JPEG may look different on screen versus your home printer. The PNG and vector files preserve more accurate color data. If you are printing for sale, test a sample first.
Better approach: Open the file in an image editor and note the dimensions in inches at 300 dpi. If you need a larger size, use the vector file and scale it up without altering the resolution. Calibrate your monitor or use a color profile for consistent prints.
How Misusing the Matching Clip Art Hurts Your Design Cohesion
The set includes matching clip art, which is designed to complement the patterns perfectly. Many users either ignore the clip art or place it carelessly, creating visual noise. A common mistake is using too many elements from the clip art set on top of the pattern, making the design busy and hard to read. Another is not scaling the clip art relative to the pattern repeat size. For example, a large leaf illustration placed over a dense leaf pattern can clash. The better approach is to use the clip art sparingly as accents—perhaps one central element on a card or a few small icons scattered in a scrapbook layout. The clip art also works well for creating focal points when the pattern serves as a background. Remember: the patterns already have strong visual presence, so let the clip art highlight rather than compete.
Mistakes in Digital vs. Physical Application
Creators often apply the same workflow for digital and physical projects without adjusting settings. For digital use (blogs, social media, planners), the JPEG or PNG at 150 dpi is often sufficient and loads faster. Using the 300 dpi file for web can slow down your page unnecessarily. Conversely, for physical prints, using a low-resolution version results in poor quality. Another mistake: not accounting for the background color. Some patterns have a transparent background in PNG, but if you print on colored paper, the white areas of the pattern may show. The JPEG will have a white background. Choose your file based on whether you need transparency. For decoupage, printing on white cardstock is easiest; for fabric, you may need to adjust the pattern to a lighter tone.
Better approach: Keep separate folders for digital and print versions. For digital, downsample to 150 dpi and save as JPEG. For print, use the PNG with transparency if you need to layer, or the vector file for maximum control. Test a small print on the intended material before committing to a large run.
Neglecting the Editable Nature of Vector Files
Many users never open the AI or EPS files because they lack the software or assume the design is fixed. This means they miss out on customizing the pattern to match their brand or project. The patterns are fully editable: you can change the color of the leaves, rotate elements, adjust the scale, or even remove certain motifs. This is incredibly valuable for businesses that need a consistent look across products. Even hobbyists can tweak the colors to fit a wedding theme or a child’s nursery. A free tool like Inkscape or Gravit Designer can handle SVG and PDF files if you do not have Adobe products. Don’t assume you have to use the patterns as-is. Experiment with color variations using the vector files; you might create a whole new design.
Missing the Opportunity to Combine Patterns from the Set
The four patterns in the Green Leaf Seamless collection share a cohesive style but each has a distinct illustration. A common mistake is using only one pattern per project when mixing them can add depth. For a scrapbook page, you could use one pattern as the main background and another as a strip or border. For fabric design, alternating two patterns on different panels creates visual interest. Because they come from the same set, they harmonize naturally. Try overlaying one pattern at low opacity over another in your software, or use the clip art to bridge them. This is an easy way to elevate your designs without extra cost.
Practical Tips for Downloading and Organizing Files
When you purchase or download the Green Leaf Seamless Patterns Graphic, you receive a zip folder containing all formats. A common mistake is extracting only the needed file and losing track of the others. Store the entire folder with a consistent naming system. Make sure your software can open the specific formats; for instance, older versions of Illustrator may not open newer AI files. The PDF and SVG are typically safer cross-platform choices. If you are sharing with a print shop, ask which format they prefer. Most commercial printers accept high-res PDFs with embedded patterns. For home printing, JPEG or PNG works fine.
Better approach: Unzip the folder and rename the files with a clear project name (e.g., “GreenLeaf_Pattern1_300dpi.png”). Keep a master copy in a cloud drive. If you edit the vector file, save a backup copy before making changes. This way you can always revert to the original.
Final Thoughts
The Green Leaf Seamless Patterns Graphic set offers tremendous potential for scrapbooking, papercraft, fabric design, decoupage, planner decorations, sticker making, nursery art, and more. But like any tool, the outcomes depend on how you use it. Avoid the common traps: wrong format, ignoring seamless tile properties, misjudging print size, neglecting color calibration, or overlooking the editable vector files. By choosing the right file for your output, testing repeats, and customizing the patterns to your needs, you ensure professional results every time. Whether you are a beginner printing at home or a small business owner designing a product line, these patterns can save you hours of work and deliver consistent, beautiful designs. Take a few minutes to plan your approach, and you will avoid wasted materials and frustration. Happy creating!